
In part one of our “How to Make SharePoint Not Look Like SharePoint” series, we discussed the KM value of custom-designed SharePoint sites, and guided readers through the activation of Publishing Infrastructure at the site collection level, and Server Publishing at the site level. Each of these features must be activated in order to ensure your site is customizable. We noted that master pages and page layouts in SharePoint work together to create the structure of a SharePoint page, with master pages defining the top and bottom elements of your SharePoint page, coined “chrome elements” by Microsoft, while page layouts organize the structure of content presented on the page. In this blog, we’ll guide you through the creation of a SharePoint Master Page.
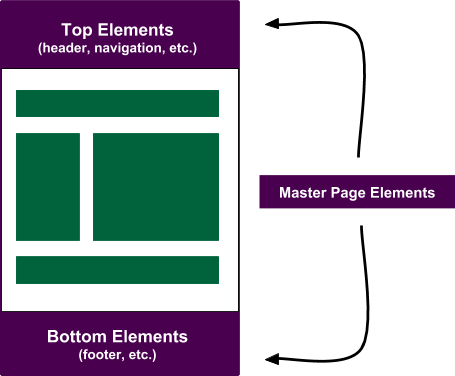
SharePoint master pages define the top and bottom elements that will appear on each page of the site where the master page is applied.
It is strongly advised that users altering SharePoint master pages have experience with hypertext markup language (HTML) and cascading style sheets (CSS), as well as debugging SharePoint, and using SharePoint Designer (SPD) or PowerShell. This walkthrough will not include the usage of SPD or PowerShell; however, debugging may be necessary, which could require their usage.
Making the KM Case for a Custom-Designed SharePoint Master Page
We mentioned in part one that the five workstreams of knowledge management lend themselves to creating user-centric experiences, and that well-developed user interfaces should be “intuitive, inviting, and effective” when determining design components.
Custom-designed SharePoint master pages can improve knowledge management initiatives by:
- Leading users to feel more comfortable and familiar with the SharePoint site.
- Decreasing the number of clicks needed to arrive at relevant pages and forms.
Many clients desire functionality that allows their users to submit content to a knowledge base, browse content, and search within content using a refinable search interface. By design, SharePoint includes this functionality, but may require three or more clicks to arrive at the desired location. While SharePoint admins can create quick links on the home menu to send users to these locations, a more user-centric design might include a header and footer that is similar to that of the client’s website. The navigation links, then, would be used to quickly route users to submission forms, selected lists or libraries, and a search interface.
Custom-designed SharePoint master pages can create a unique overall experience within SharePoint, increasing familiarity, comfort, and enthusiasm to participate in your company’s KM initiatives.
Getting Started with Your Master Page
Before building your new SharePoint master page, we recommend creating a folder where your code, including HTML, CSS, JavaScript, and any images files associated with your master page, will live. This folder will be uploaded through your site collection’s Design Manager to easily reference their content.
Inside your folder, create an HTML file with markup for the top and bottom elements. This markup should include reference attributes to any styles or scripts that will apply to the master page elements. In this blog, we’ll be creating a master page that mirrors EK’s homepage.
Our markup includes reference attributes to one CSS file and a body tag with three child attributes: header, an empty placeholder div, and footer.
Once you’ve created your HTML file and rendered it successfully locally, you’re now ready to upload your custom master page to SharePoint.
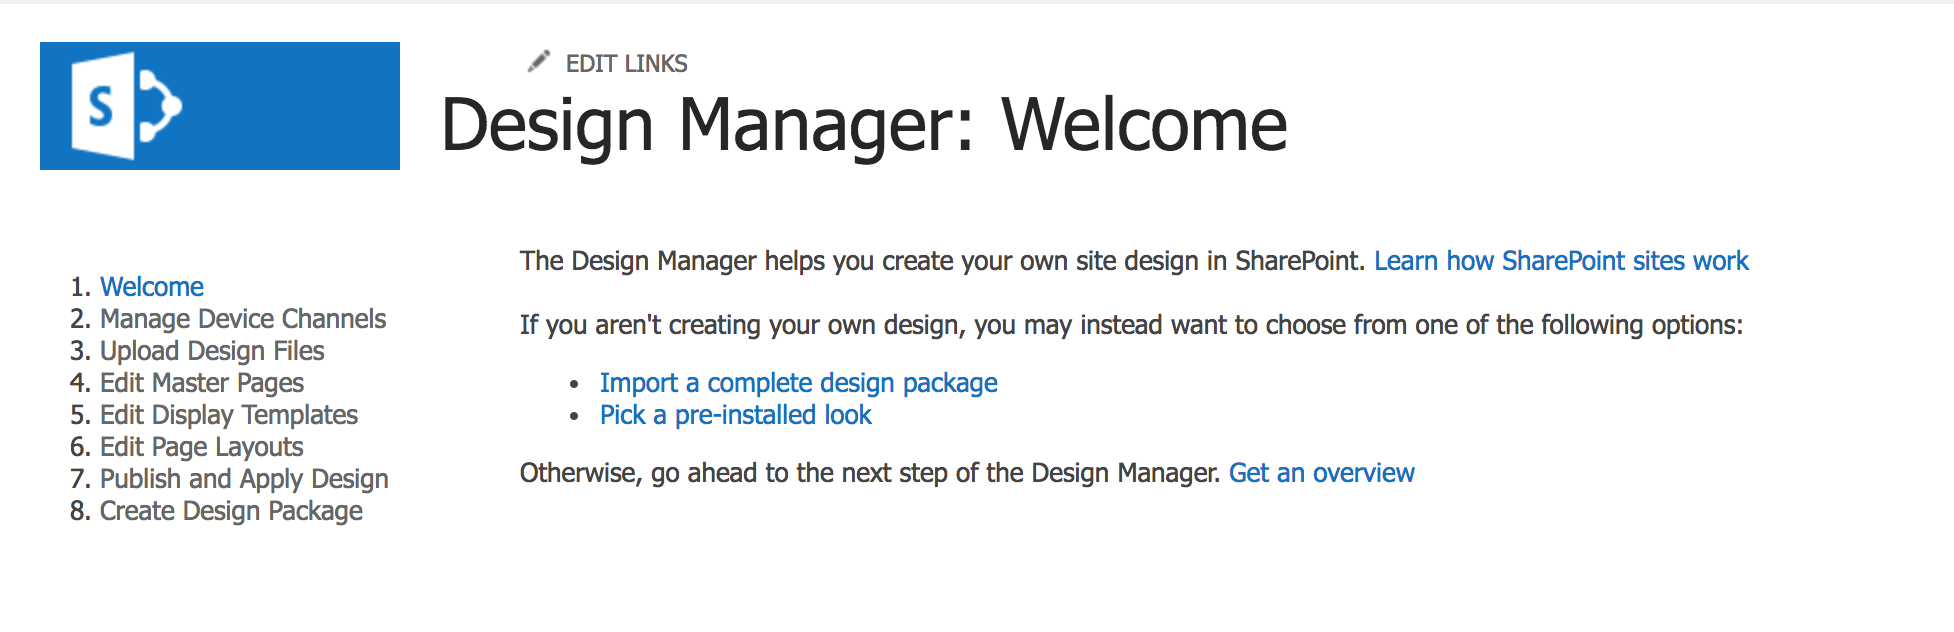
Using SharePoint’s Design Manager
In part one, we referenced Design Manager, a tool that becomes available after publishing infrastructure is enabled at the site collection level. Design Manager assists in the preparation of custom-designed SharePoint sites, allowing SharePoint administrators and designers to use it as a one-stop shop for managing aesthetic customizations.
To access Design Manager, open your Site Settings and select “Design Manager” under Look and Feel.
From Design Manager’s left navigation, select “Upload Design Files.” In this section’s introductory blurb, you’ll find a URL that can be used to map your drive to a network folder or to manipulate files directly from the browser. Accessing the given URL will redirect you to the Master Page Gallery. The Master Page Gallery is the design center of your SharePoint site collection. Inside it lives the code governing the display of each component of the site collection’s sites, including its search results and navigation.
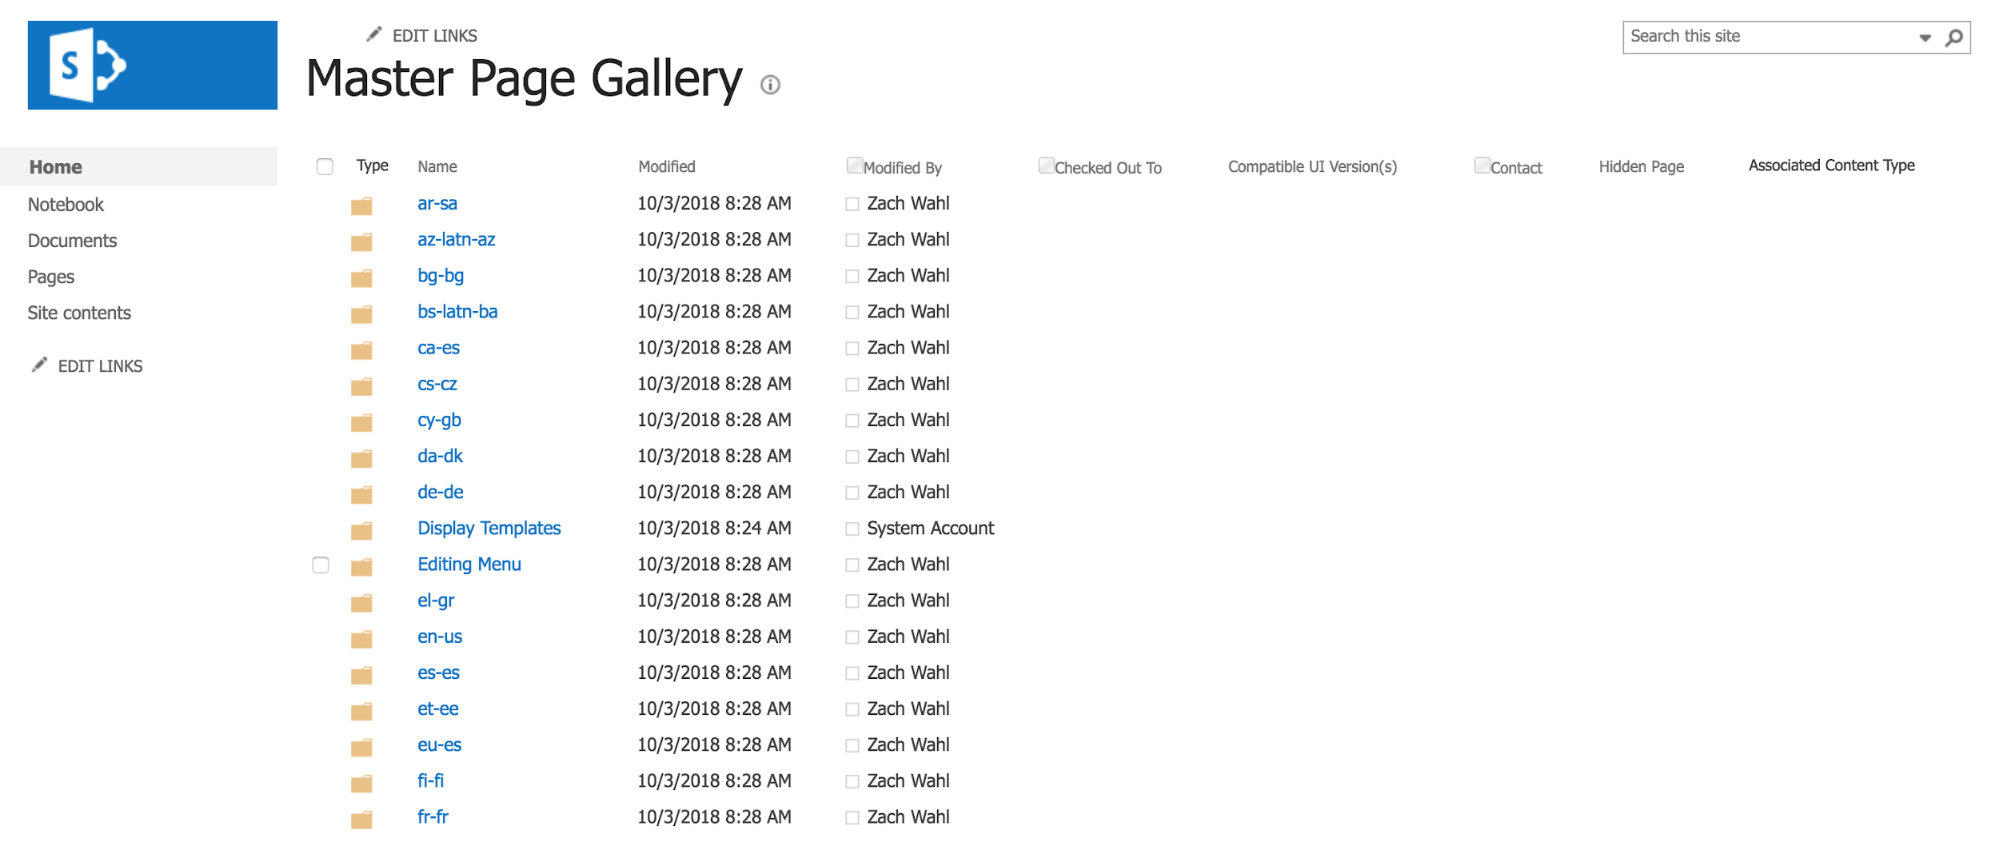
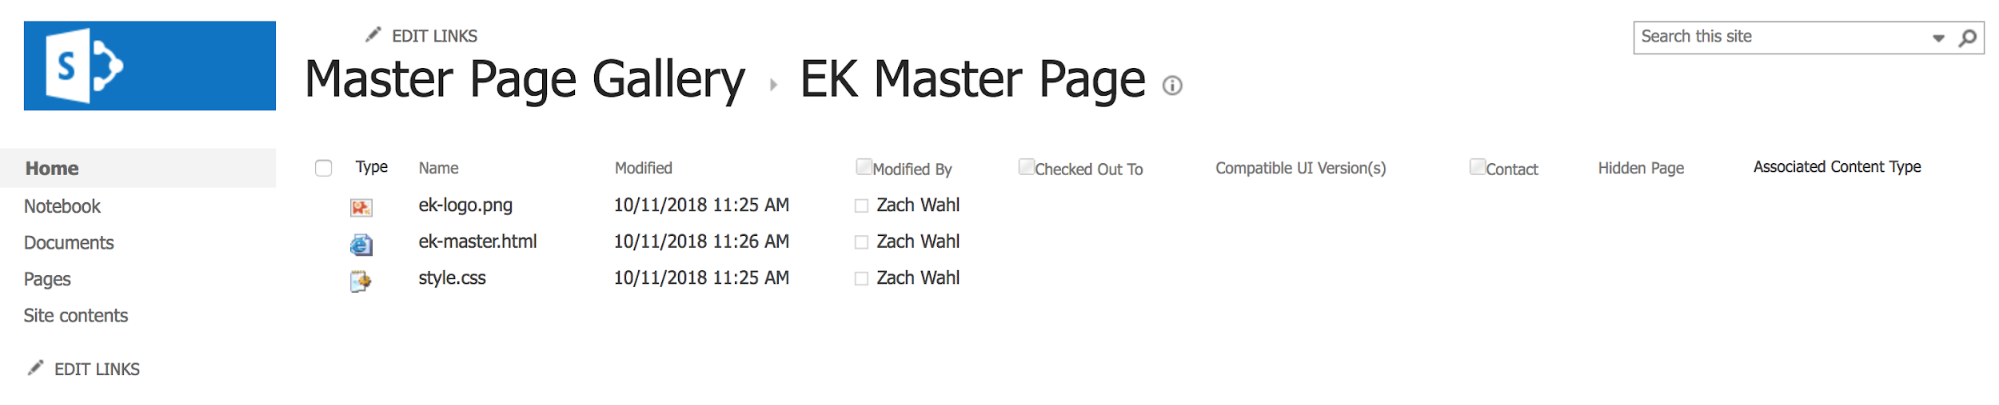
Inside your Master Page Gallery, create a new folder where you can upload and publish major versions of your HTML code and any supporting code and images. We’ve created a folder named “EK Master Page” that includes three files: ek-master.html, style.css, and ek-logo.png.
Back in Design Manager, select item four from the left navigation, “Edit Master Pages.”
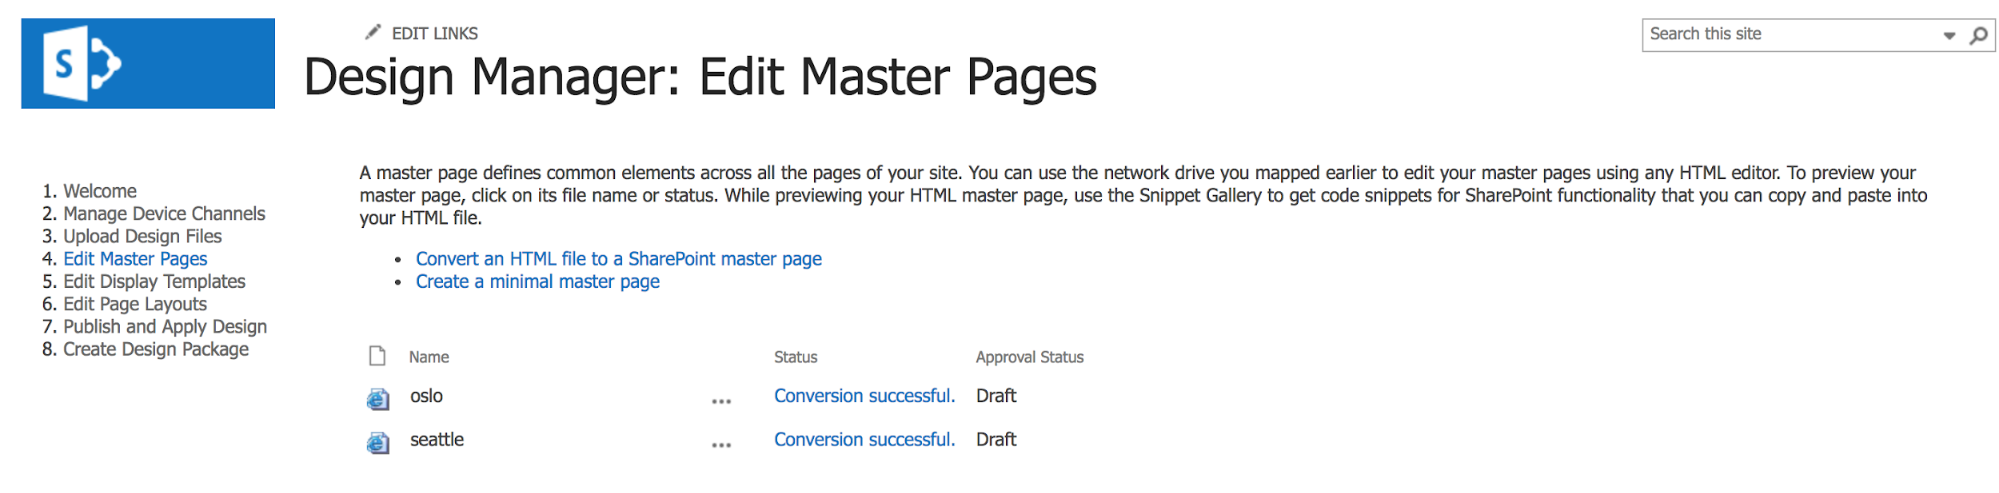
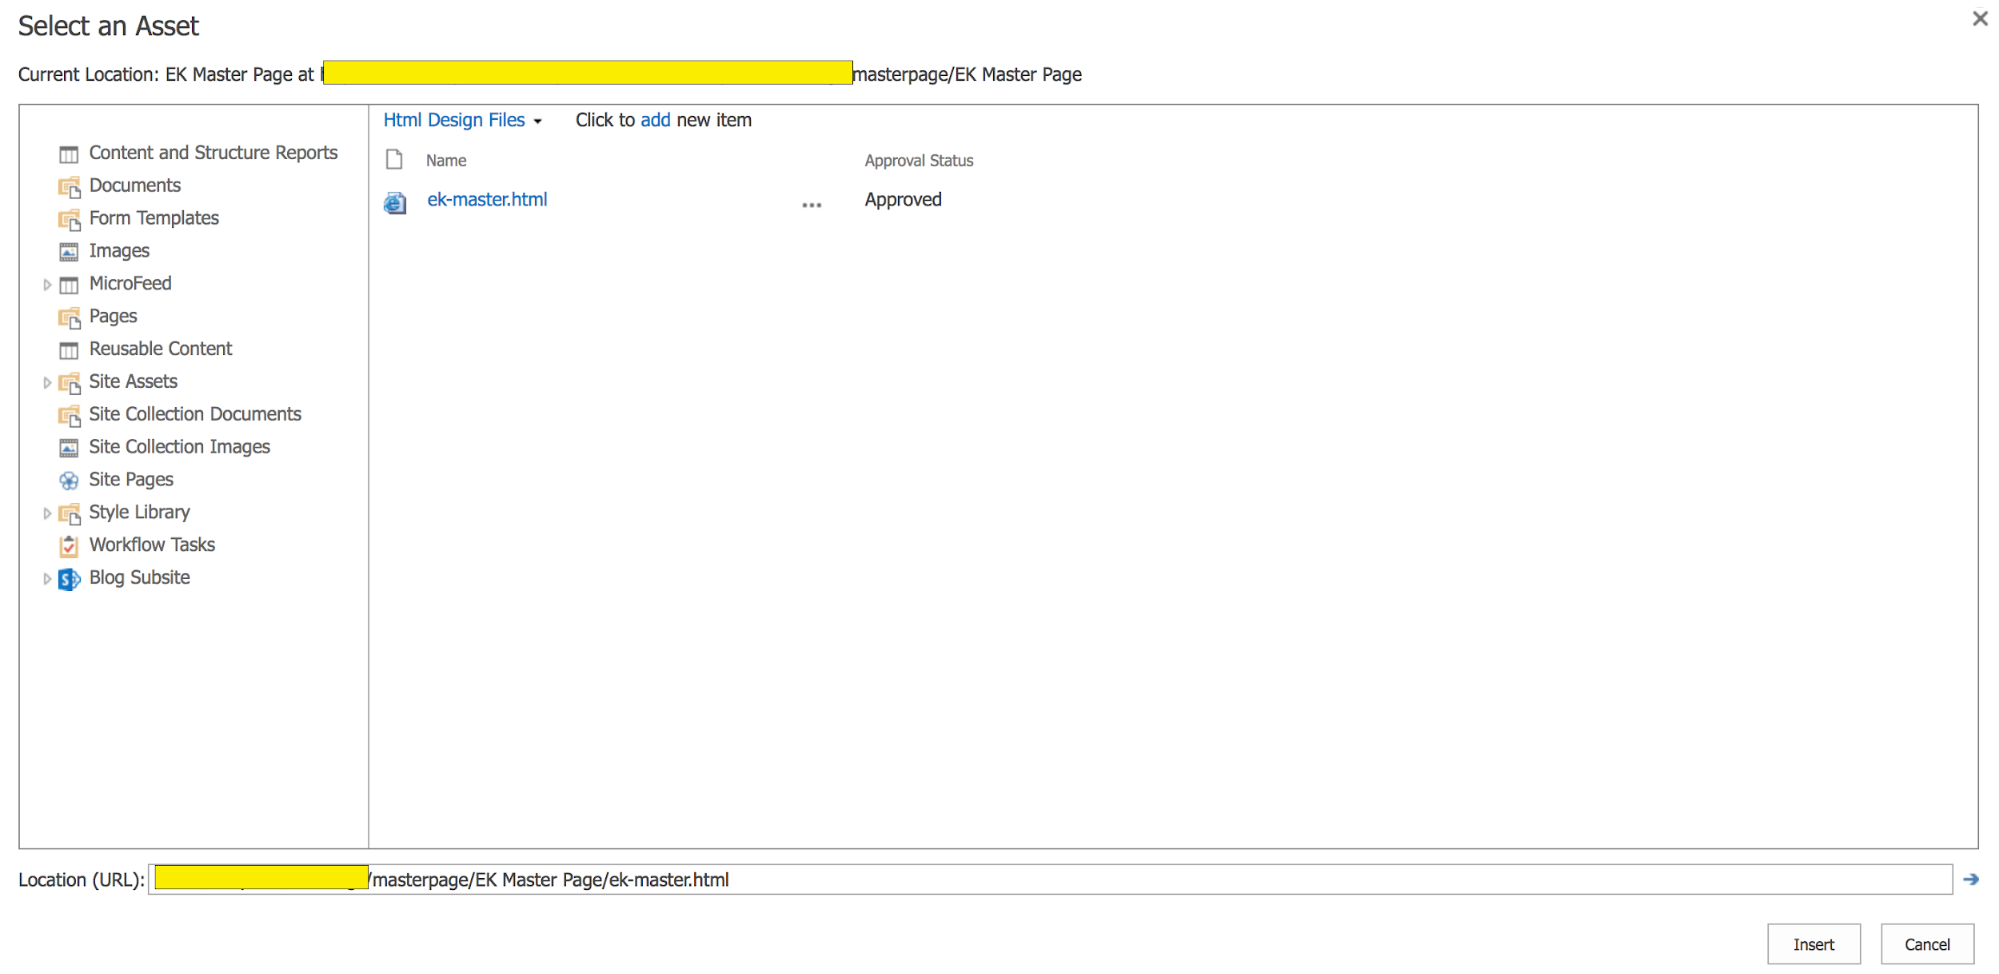
Select “Convert an HTML file to a SharePoint master page.” A modal will display, allowing you to select the location of the item you’ll convert to a master page. Navigate to the folder you uploaded to your Master Page Gallery, and select the HTML file.
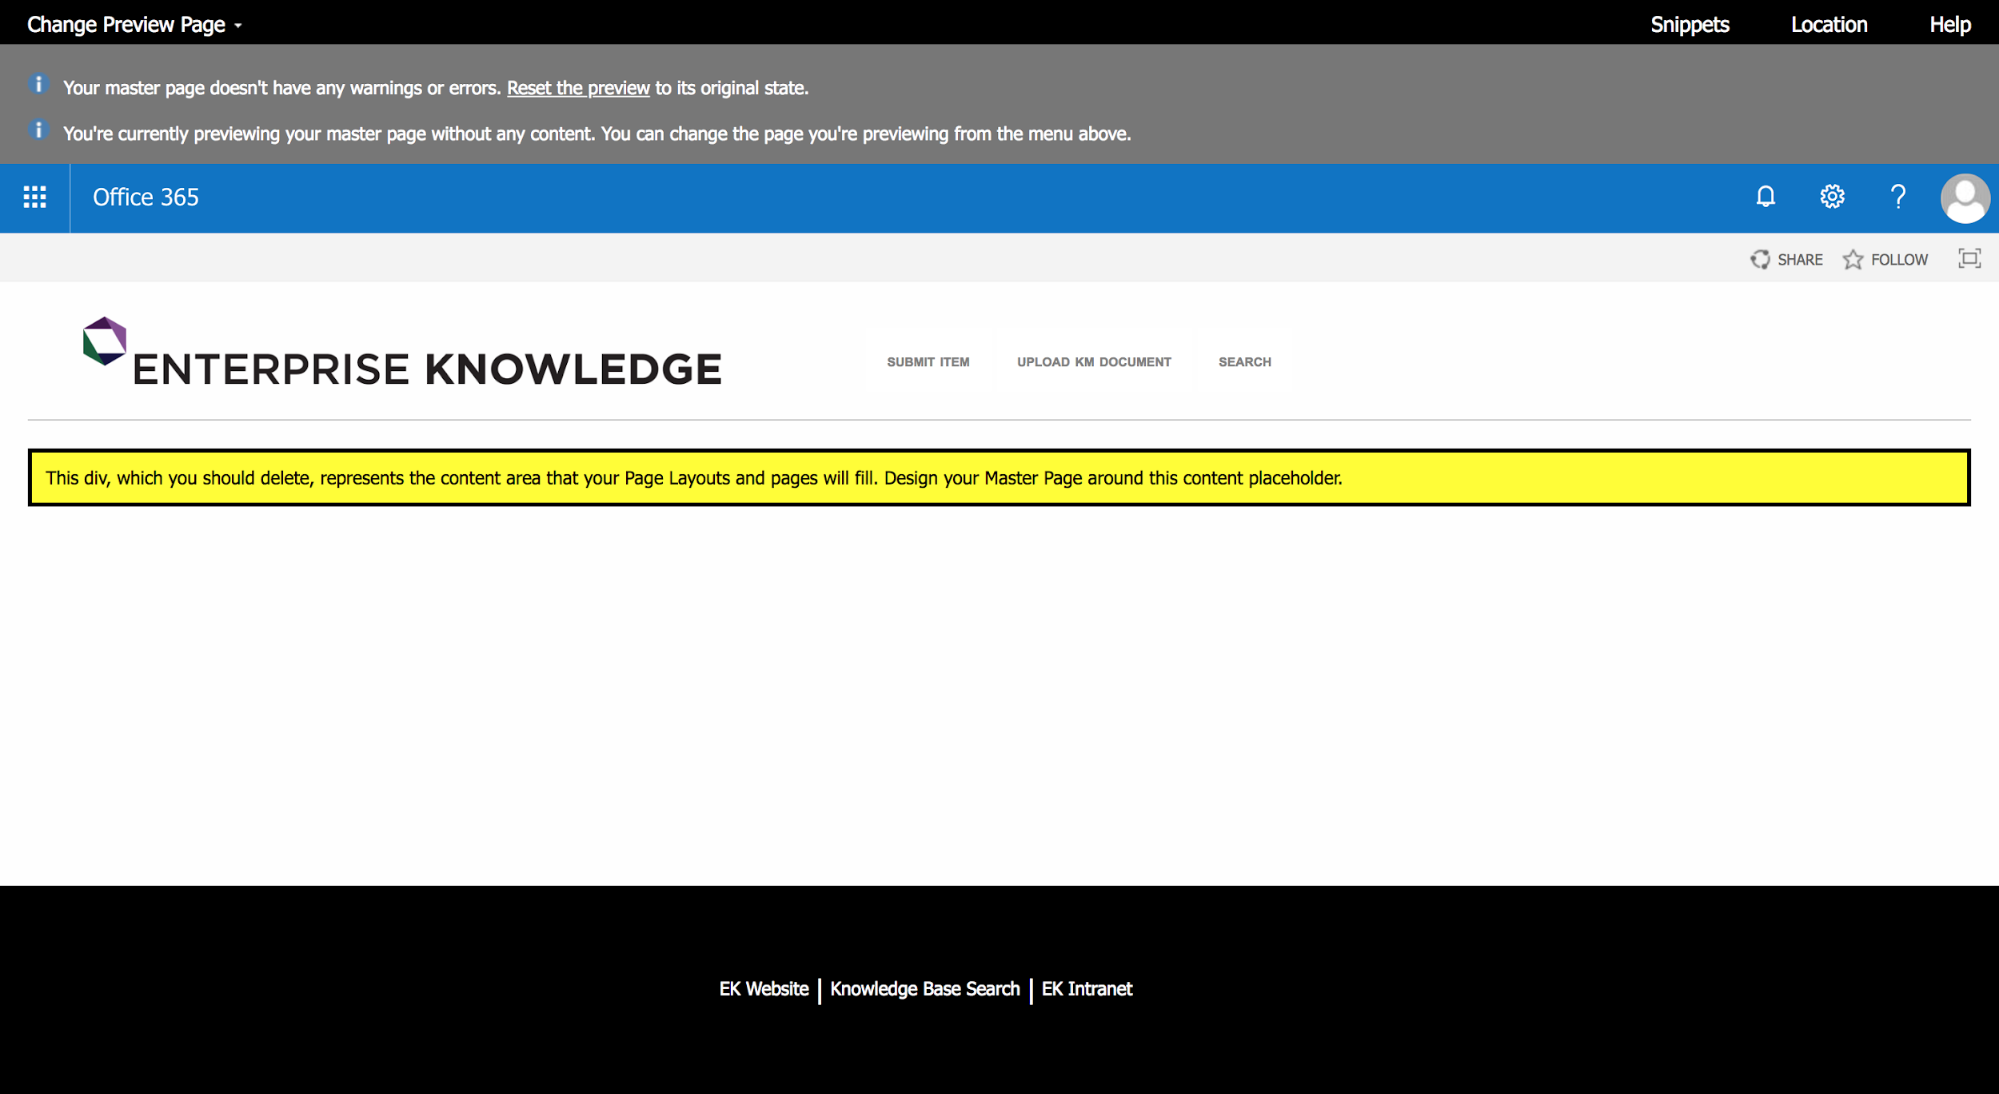
Upon successful upload, the HTML file will be added to the master page list with the status “Conversion successful.” Click the “Conversion successful” hyperlink to preview your master page.

Editing Your New Master Page
When SharePoint converts your HTML document to a master page, it generates hundreds of lines of code that allow the page to be usable within its system. As you’ll likely notice, a yellow div has been added below your content. The text within the div reads, “This div, which you should delete, represents the content area that your Page Layouts and pages will fill. Design your Master Page around this content placeholder.” The final step of creating the master page is moving that content placeholder to the location in your code where you’ve added your placeholder div.
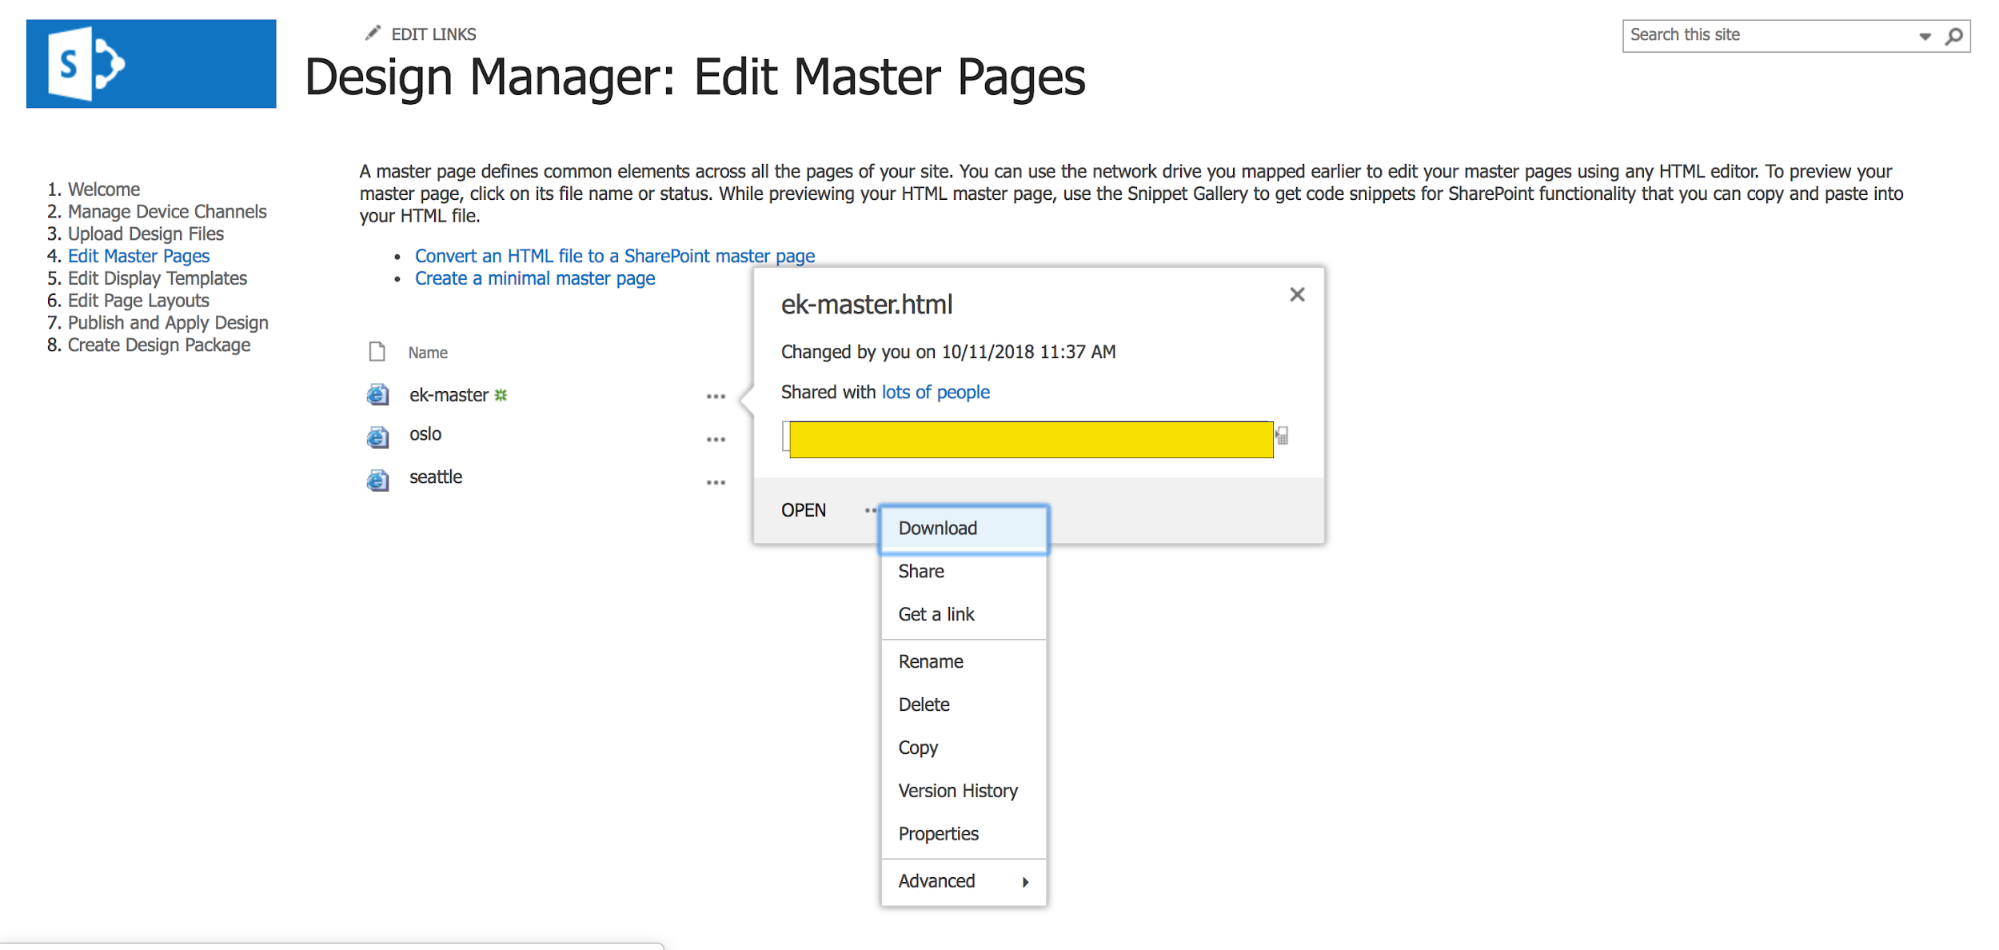
To complete this step, you’ll need to navigate back to Design Manager’s Edit Master Pages section and download the code associated with your master page file.
In your code editor, find the div with the data-name “ContentPlaceHolderMain.” Select the div and all of its child components. Cut and paste it in the location of your placeholder div, then save the updated code. Remember, if you had applied any styling to your placeholder div, such as bottom margins to balance a fixed positioned footer, you’ll need to re-apply that to div[data-name=”ContentPlaceHolderMain”] and reupload the CSS file to your Master Page Gallery.
When you’ve edited your master page HTML, navigate back to your Master Page Gallery, either by accessing it through the hyperlink in Design Manager’s Upload Design Files, or by using your mapped network folder. Reupload your master page HTML and any other updated files to the folder you created, and publish major versions of each file. From Design Manager’s Edit Master Pages, select “Conversion successful” next to your filename to see a preview of the updated master page.
Applying Your New Master Page
With your new master page converted and content placeholder in place, you’re now able to apply your master page to a SharePoint site. Using the gear in the top right corner, navigate to Site Settings. Under Look and Feel, select “Master Pages.”
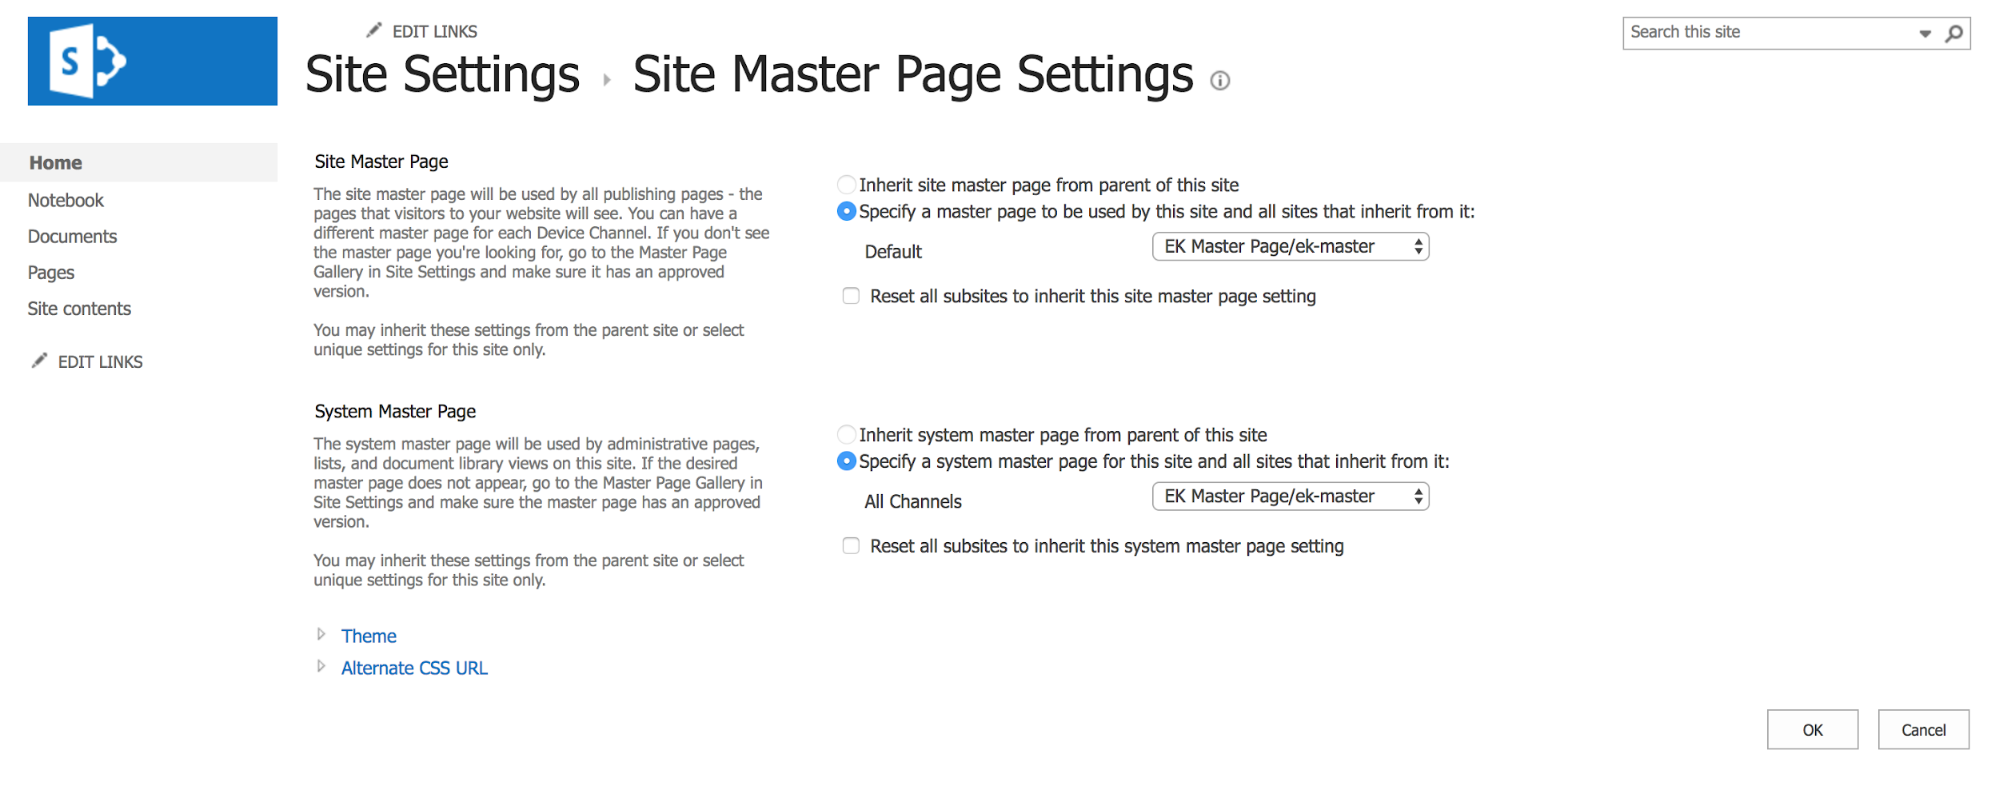
Depending on your desired settings, specify where your new master page should be used. Site Master Page would apply the master page to your publishing pages–any pages that are uploaded to the site collection’s “Pages” library. System Master Page would apply the master page to views of your administrative pages, document libraries, and lists. For consistency, and to create the intuitive design that makes SharePoint customization a noteworthy feature of KM initiatives, we have applied our master page to both site and system pages.
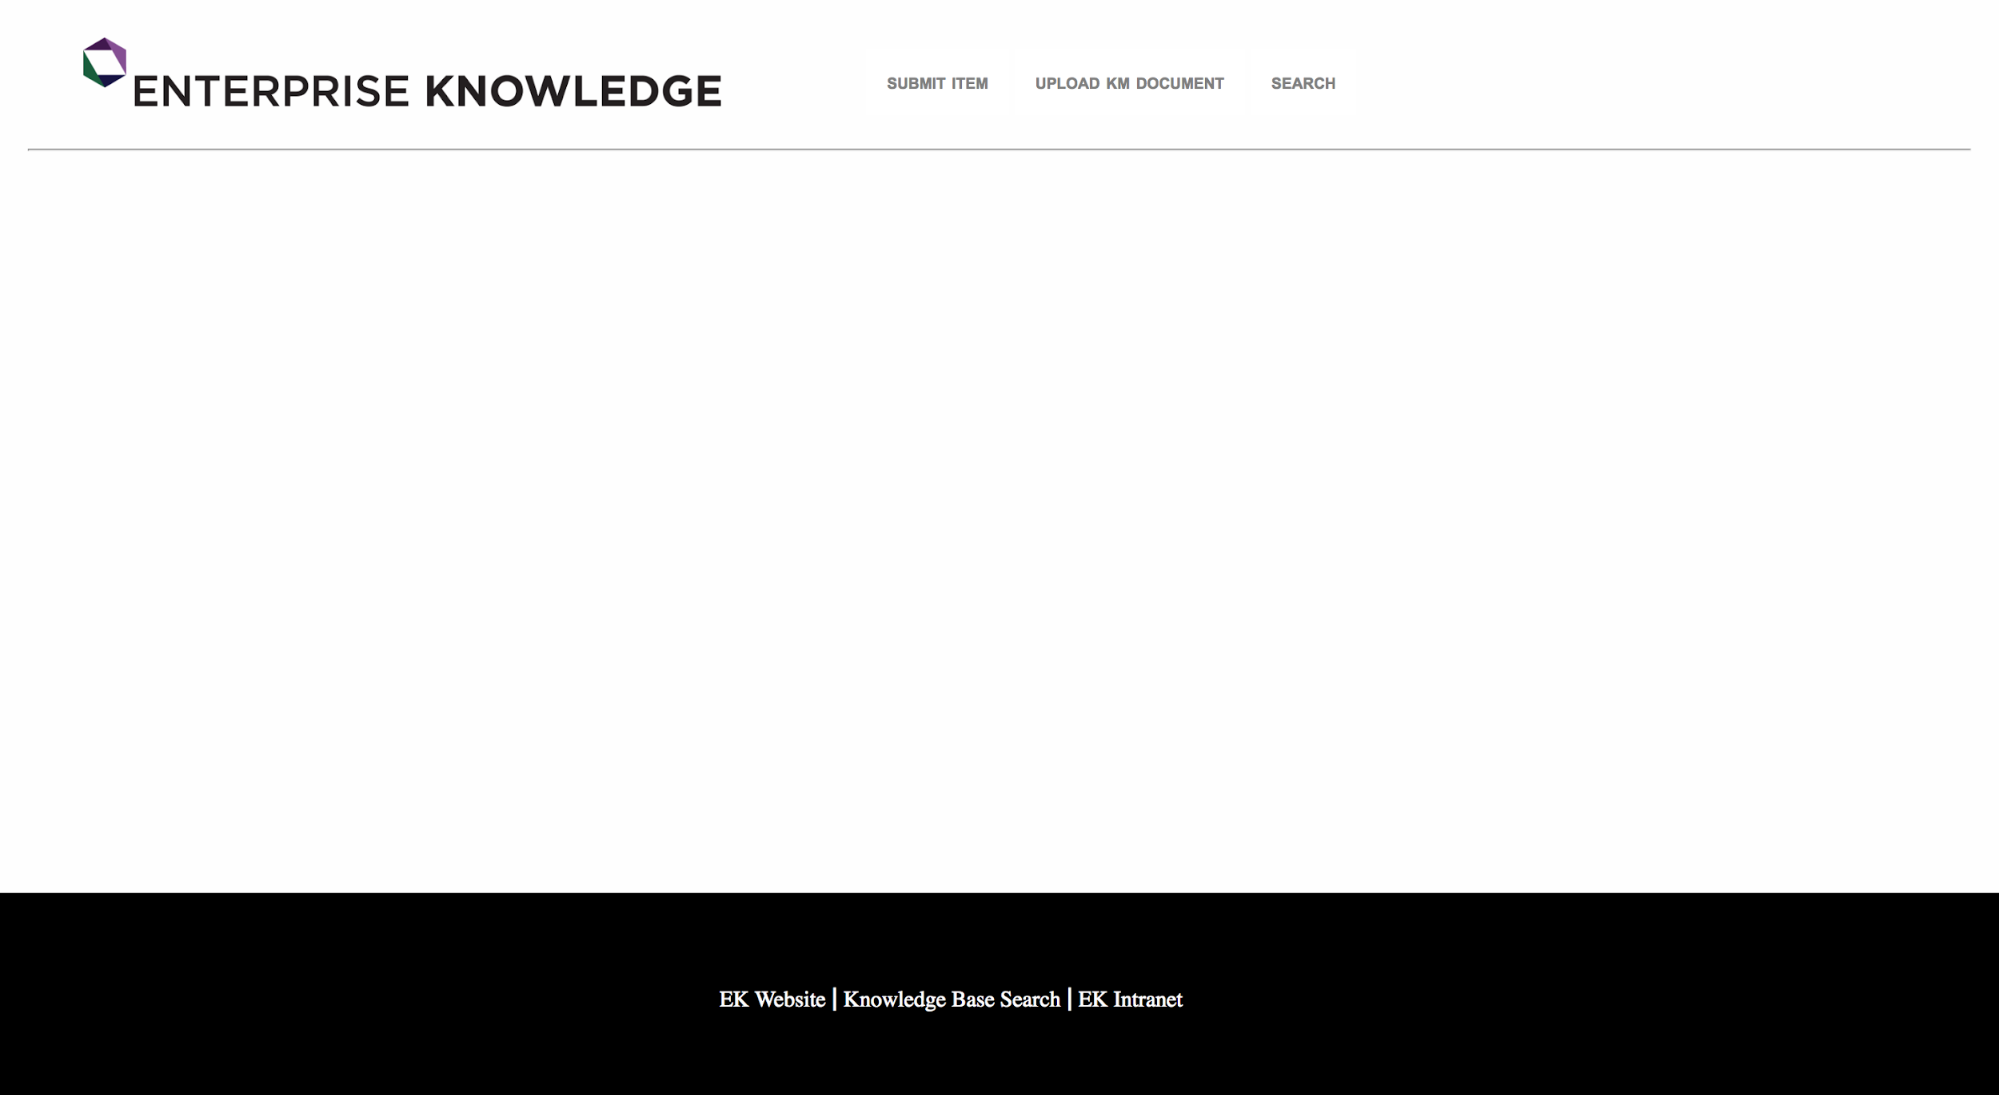
With your new master page applied, your SharePoint homepage can change significantly. See our change below.
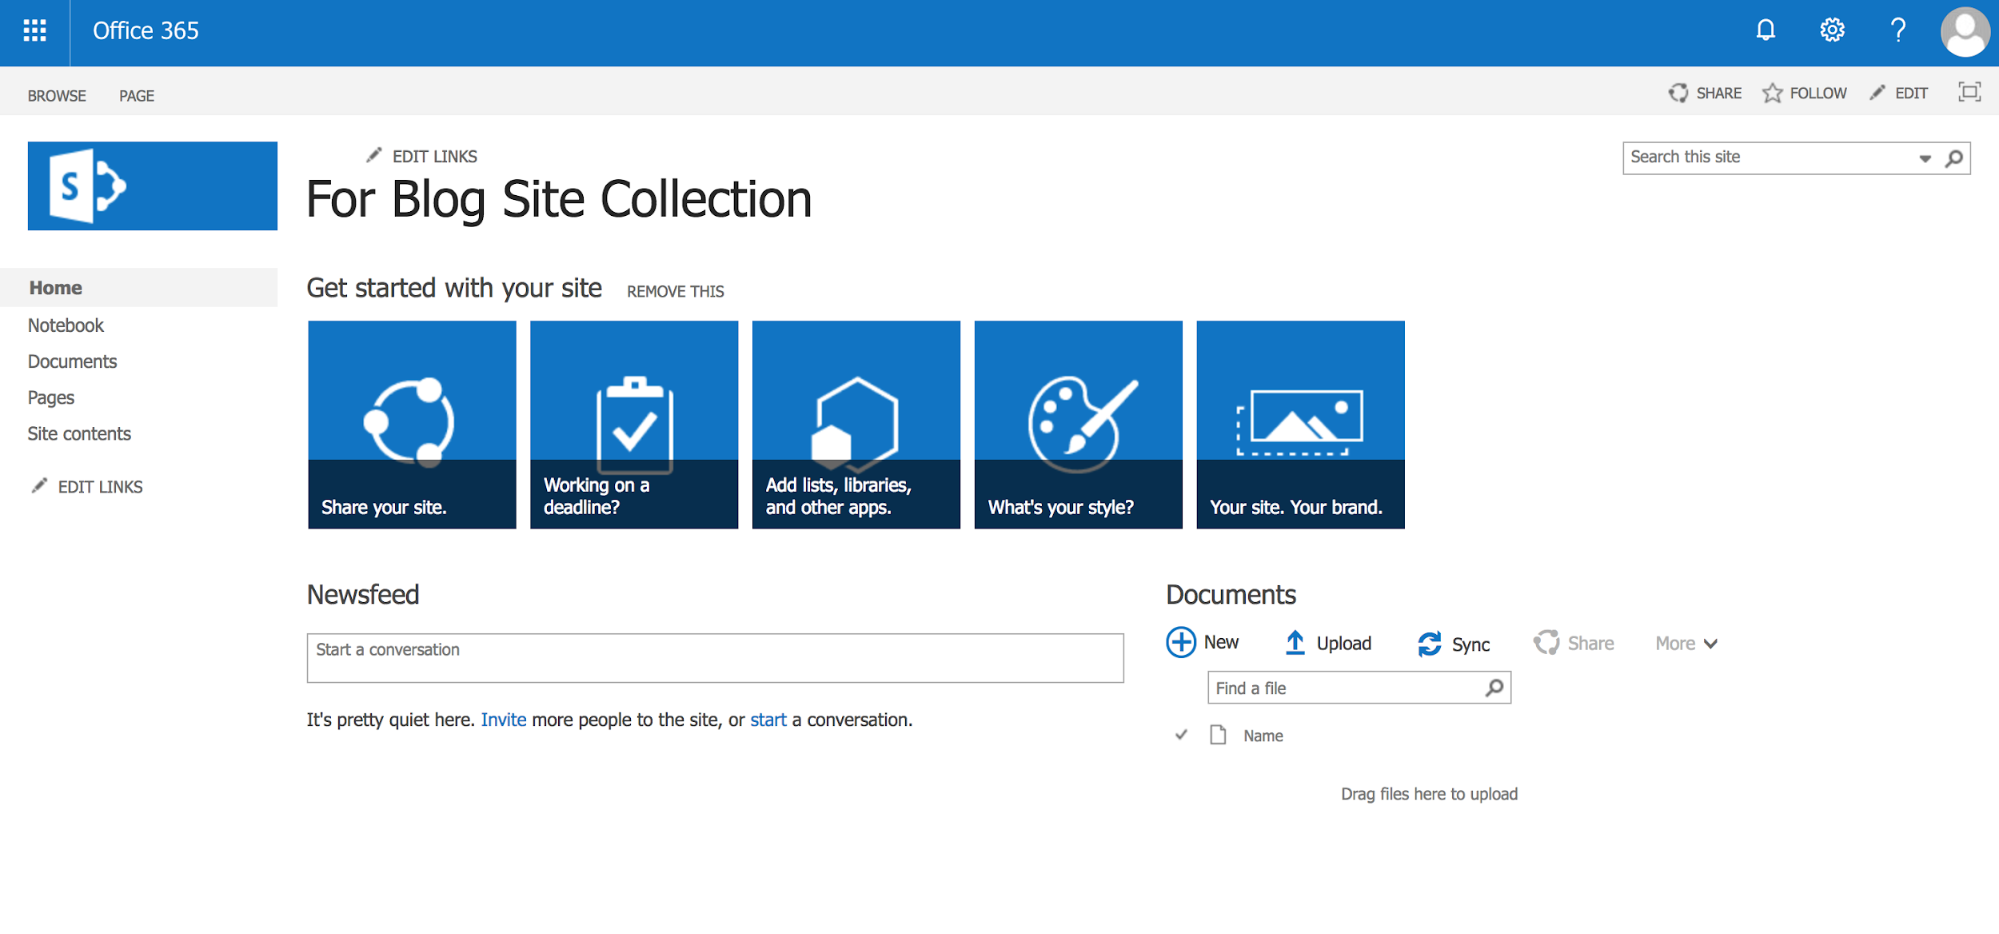
The SharePoint out-of-the-box view of our site collection’s homepage.
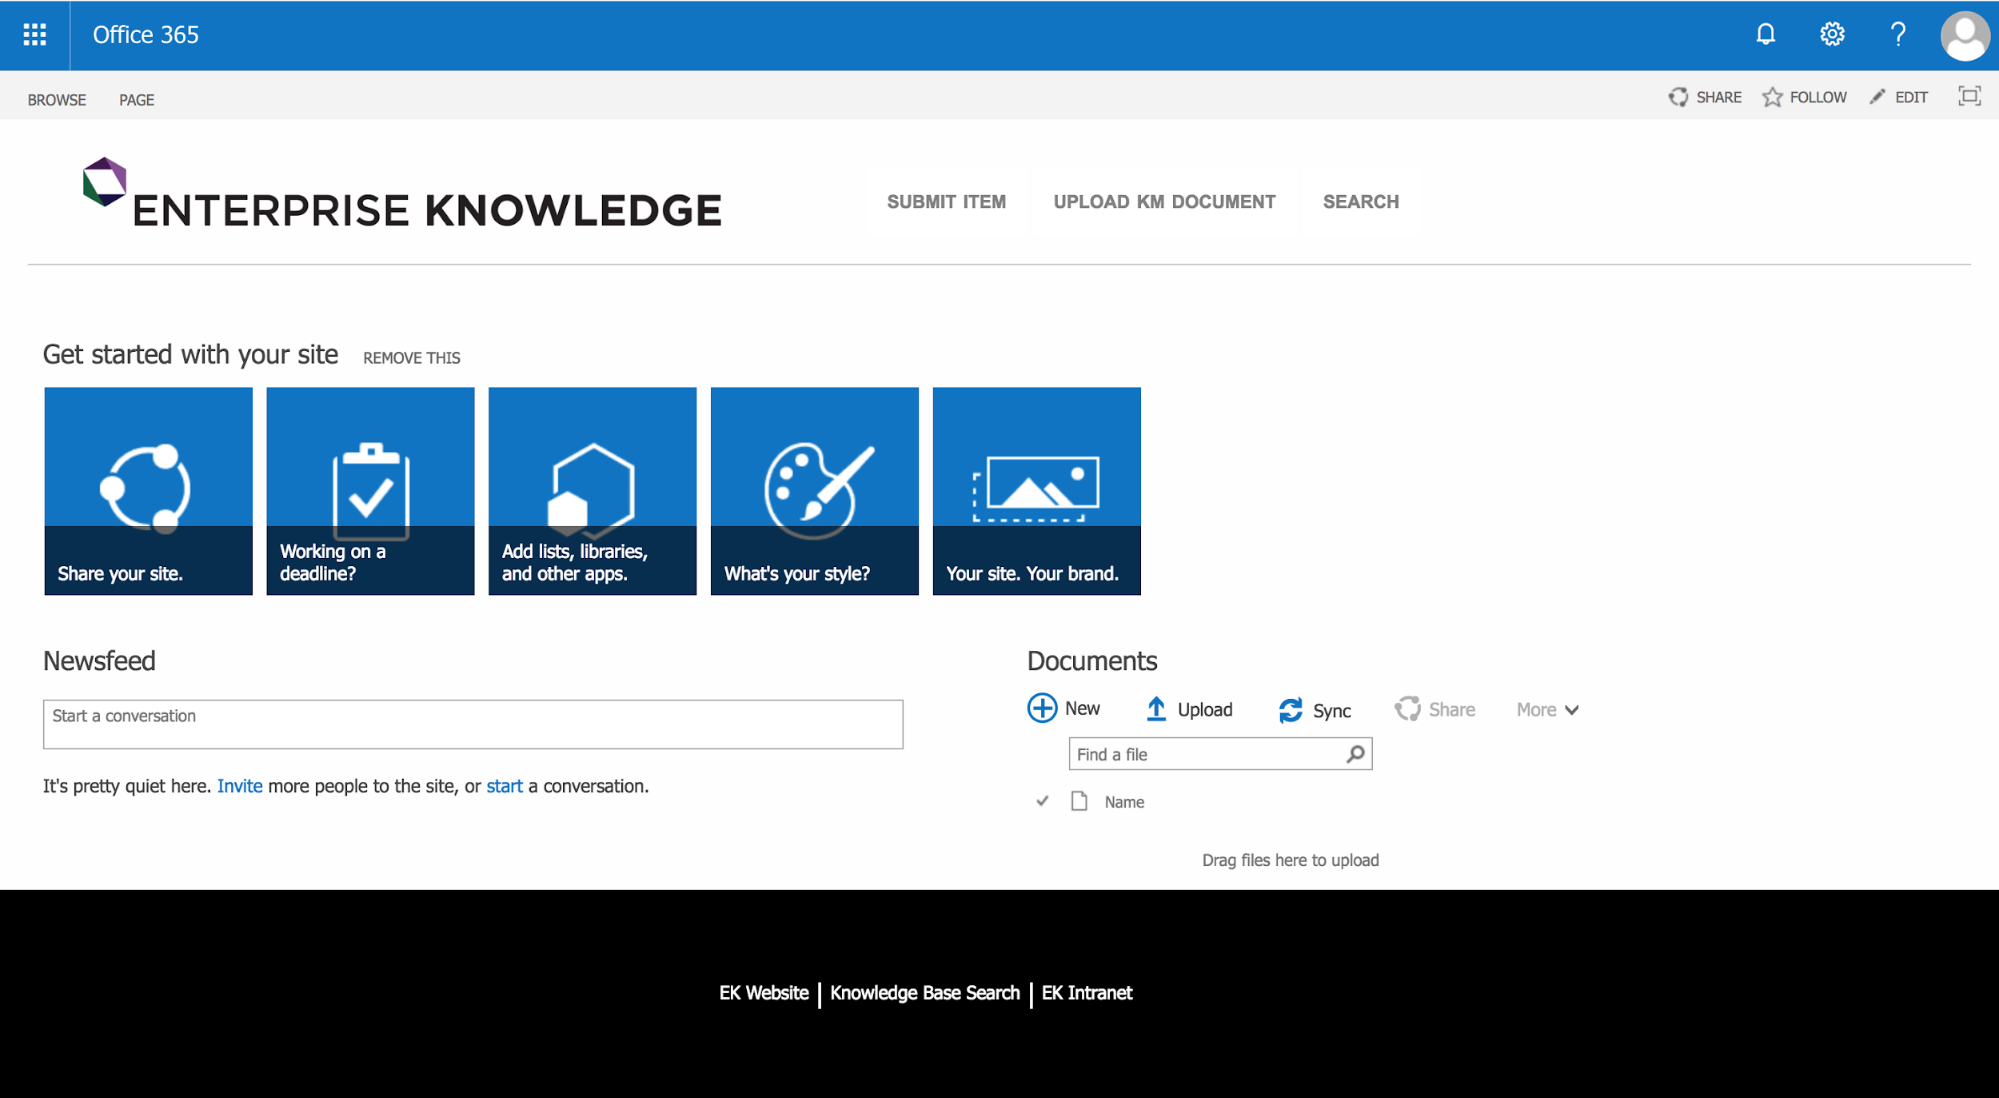
Our SharePoint homepage with custom master page applied.
Is Something Missing?
“Where’s the title?”
“Where has the navigation gone?”
You may be questioning the whereabouts of certain features that you expected to appear once your master page was applied. Custom-designed SharePoint master pages do not include out-of-the-box (OOTB) master page features, such as navigation and title, by default. Each of these features is displayed differently dependent upon the master page you use. EK works closely with clients to determine which features should be included in their customized design to maximize their KM efforts.
Now that your SharePoint master page is created, the final step is to create a custom page layout, which will determine where items are displayed on the page. We’ll explain it thoroughly in part three of “How to Make SharePoint Not Look like SharePoint.”
Looking to create your own customized SharePoint master page to increase your company’s KM efforts? Contact us. We’ll be glad to help you.